

How to Turn Your Idea Into a Custom Patch That Actually Looks Good
Patches have quietly become one of the easiest ways to add personality to gear — a jacket, a backpack, a uniform, a team hoodie. But the gap between "I have an idea for a patch" and "I'm holding a patch I'm proud of" is bigger than most first-timers expect. Here's what actually matters if you want the result to look as good as the idea did in your head.
Start With the Concept, Not the Colors
It's tempting to jump straight into picking thread colors or backing types, but the strongest patches start with a simple, bold concept. Ask yourself what the patch needs to communicate in half a second — a logo, a mascot, a slogan, a symbol — because that's roughly how long anyone glancing at a jacket or bag will actually look at it. Overcomplicated artwork with fine text or thin gradients tends to lose detail once it's stitched or molded, so simplicity at the concept stage pays off later.
Sketch It Before You Digitize It
Even a rough pencil sketch or a quick mockup helps you catch problems early: text that's too small, elements crowding each other, colors that won't separate cleanly once stitched. If you're not confident designing from scratch, using a a Custom patch designer tool is a practical middle step Custom patch designer online tool is a practical middle step — it lets you drag shapes, text, and colors into place and see roughly how the finished patch will read before you commit to a manufacturing file. It won't replace a professional digitizer, but it's a fast way to test ideas without wasting a revision round.
Match the Style to the Use Case
Not every patch should be embroidered. A few quick guidelines:
- Embroidered patches work best for classic, textured looks — team logos, name tags, uniform badges.
- Woven patches handle fine detail and small text far better than embroidery.
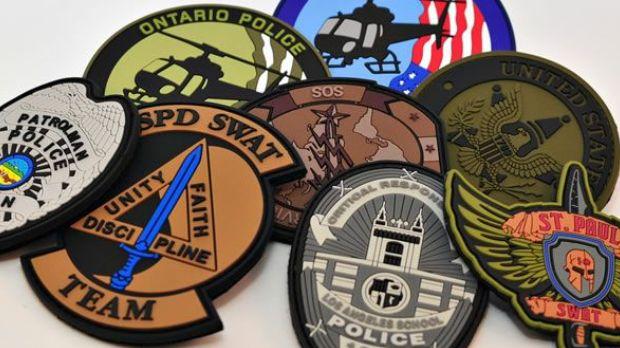
- PVC or rubber patches are the go-to for outdoor gear, tactical bags, or anything that needs to survive rain and abrasion.
- Leather patches add a premium feel to caps, wallets, and jackets.
- Chenille patches give that raised, varsity-jacket texture.
Picking the wrong style for the wrong surface is one of the most common (and avoidable) mistakes first-time buyers make.
Get the Backing Right
Backing choice affects both cost and usability, so it's worth deciding early rather than as an afterthought:
- Sew-on — most durable, standard for uniforms and jackets.
- Iron-on — convenient for one-time application on fabric.
- Velcro — ideal for patches you'll swap between items.
- Adhesive — quick and temporary, best for smooth, hard surfaces.
Don't Skip the Proof Stage
Before any bulk order goes into production, ask for a digital proof — and if the order is large or the design is intricate, a physical sample too. It's a small delay that saves you from discovering a color mismatch or sizing issue after hundreds of patches have already been made.
Order Smart
If you're ordering in volume, request quotes from more than one supplier, check minimum order quantities, and confirm turnaround times up front. Rush production almost always costs more, so building in a little lead time is one of the simplest ways to keep your budget in check.
The Bottom Line
A great patch isn't just about picking a nice design — it's the result of matching the right style, backing, and production process to how the patch will actually be used. Whether you're designing something simple for a single hoodie or planning a bulk order for a whole team, working with an experienced patch maker from the concept stage onward makes the difference between a patch that looks like an afterthought and one that looks intentional.

 English
 Arabic
 French
 Spanish
 Portuguese
 Deutsch
 Turkish
 Italiano
 Russian
 Romaian
 Portuguese (Brazil)
 Greek
Greek